This was one of the first few recipes I tried out when I started cooking my own "healthy" meals. I found the original recipe here on the Betty Crocker website. I thought, well, this is simple-ish, it'll make enough for tomorrow, and I don't have to make a crust! Sweet!
If you have a look at the original recipe, it calls for some pretty simple things. You'd think I was being ridiculous for trying to healthify it, but yes, it can be further healthified....and that's how I ended up with the recipe below. I switched out liquid egg whites for whole eggs, almond milk for regular milk, left out the oil, and left out the cheese. I'm not totally sure what the consistency on the inside was supposed to be like, but the first time I made these, I followed the recipe to the letter and ended up with a pretty cake-like middle...i.e. not at all the chicken pot pie I was hoping for. The second time I made them, I kept sticking them with toothpicks until I was sure that they would hold together, but still be a bit gooey on the insides...I love me some pot pie gravy!
I also just want to add here how much I hate recipes for always starting with "Preheat the oven at...." before you get to the ten million steps that follow. What they're telling me is that while I'm taking half an hour to follow all the other steps, my oven is on and wasting electricity for an extra 20 minutes. Silly, silly recipe writers. That being said, I add in the preheating step into the recipe where I think it should be done (see below if you don't believe me).
Mini Chicken Pot Pies
Makes 12 mini pot pies
Ingredients:
Directions:
1) Heat a frying on the stove over medium-hight heat. Spray with non-stick spray and cook the chicken about 6 minutes or until no longer pink in the middle. Add the onions to the pan, and cook about 3 minutes.
2) Add in your chopped vegetable(s), salt, and pepper. If you'd like to add in any other seasonings, now is the time. Stir all the ingredients together to mix in the spices and make sure that all the chicken and veggies get coated in them evenly. Remove from heat while you prepare the baking mixture.
3) Preheat the oven to 375F, and spray 12 muffin cups with cooking spray.
4) In a bowl, whisk the Bisquick, almond milk, and egg whites together until well blended. Spoon one, JUST ONE, tablespoon (1 tbsp) of the mixture into each muffin cup.
5) Add 1/4 cup of the cooked chicken and veggies to each cup, then top each with one more tablespoon of the Bisquick mix.
6) Bake it in the oven for about 30 minutes. Tops should be golden brown, but test the insides with toothpicks until you're happy with the consistency (i.e if the toothpicks come out clean, the pies are definitely done and the insides are going to be pretty solid. BUT if you like gravey-esque gooey insides like me, stop cooking the pies when the outsides are solid, but before they cook all the way through.)
7) Remove the muffin tin from the oven when they're done, and let them cool until you can stand touching them. CAREFULLY loosen the sides of the pies from the tins, remove them from the pan, and let them cool on a rack.
Serve and ENJOY!! :D
Ingredients:
- 1 lb. chicken breast, boneless & skinless, cut into tiny bite-sized pieces (remember that they'll eventually be in a muffin tin)
- 1 medium onion, chopped
- 1 cup chopped vegetable(s) of choice (I used potato and carrots, but feel free to use whatever, broccoli, peas, etc. or a mix thereof)
- 1/2 tsp salt
- 1/4 tsp pepper
- 1/2 cup Bisquick (I had the Heart Smart box, but any kind of Bisquick or baking mix will work fine)
- 1/2 cup unsweetened almond milk
- 2 egg whites (or 1/3 cup liquid egg whites)
Directions:
1) Heat a frying on the stove over medium-hight heat. Spray with non-stick spray and cook the chicken about 6 minutes or until no longer pink in the middle. Add the onions to the pan, and cook about 3 minutes.
2) Add in your chopped vegetable(s), salt, and pepper. If you'd like to add in any other seasonings, now is the time. Stir all the ingredients together to mix in the spices and make sure that all the chicken and veggies get coated in them evenly. Remove from heat while you prepare the baking mixture.
3) Preheat the oven to 375F, and spray 12 muffin cups with cooking spray.
4) In a bowl, whisk the Bisquick, almond milk, and egg whites together until well blended. Spoon one, JUST ONE, tablespoon (1 tbsp) of the mixture into each muffin cup.
5) Add 1/4 cup of the cooked chicken and veggies to each cup, then top each with one more tablespoon of the Bisquick mix.
6) Bake it in the oven for about 30 minutes. Tops should be golden brown, but test the insides with toothpicks until you're happy with the consistency (i.e if the toothpicks come out clean, the pies are definitely done and the insides are going to be pretty solid. BUT if you like gravey-esque gooey insides like me, stop cooking the pies when the outsides are solid, but before they cook all the way through.)
7) Remove the muffin tin from the oven when they're done, and let them cool until you can stand touching them. CAREFULLY loosen the sides of the pies from the tins, remove them from the pan, and let them cool on a rack.
Serve and ENJOY!! :D
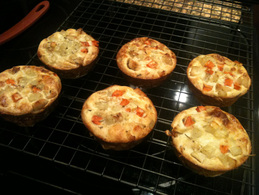
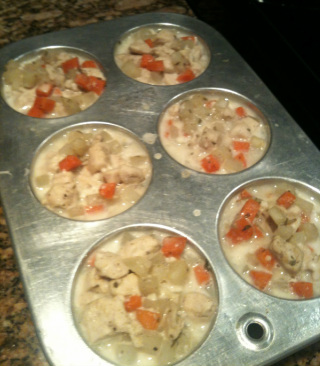 Before the oven... | 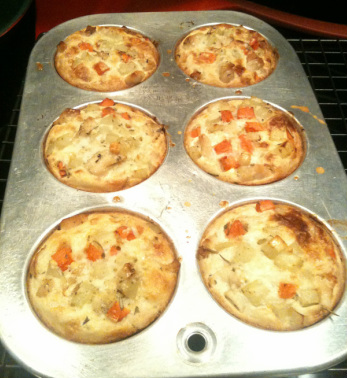 ...and after the oven! |
 RSS Feed

